


T-Bobbin (A), Rotor Attachment Hardware Kit
 Estimated delivery: -
T-Bobbin (A) rotor attachment complete hardware kit for floating 2-piece rotors
- Corrosion resistant, allows secure mounting, and smooth expansion and contraction throughout heat cycles
- This complete kit includes enough hardware for two rotors.
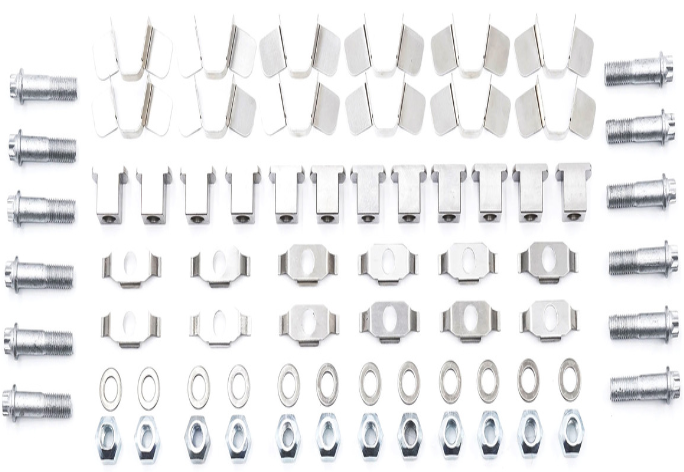
-Includes:
- 1/4 UNF aerospace grade Geomet coated bolts
- Locking nuts
- McLaren Spring Clips
- "U" clips
- T-Bobbins (A)
-Assemble torque specs: 10.5 lbf-ft / 14 Nm
Replacement of Alcon "Bobbin drive system with bolt" hardware
We recommend using new hardware every time when replacing rotor rings. If there is no visible wear, bobbins and spring clips can be reused. A bolt kit that includes bolts, locking nuts, and washers is available for purchase.
Replacement of Alcon "Bobbin drive system with bolt" hardware
Assembling / Re-assembling Instructions

:
Step 1: Disassemble the used 2-piece rotor. Discard used bolts, locknuts, and washers. Inspect remaining hardware for wear. Bobbins and McLaren spring clips may generally be re-used more than once if there is no visible wear.
Step 2: Inspect used aluminum hat and rotor surface for any damage or wear. Clean aluminum hat and rotor surface to remove any contaminants and ensure the aluminum hat is flush against the rotor.
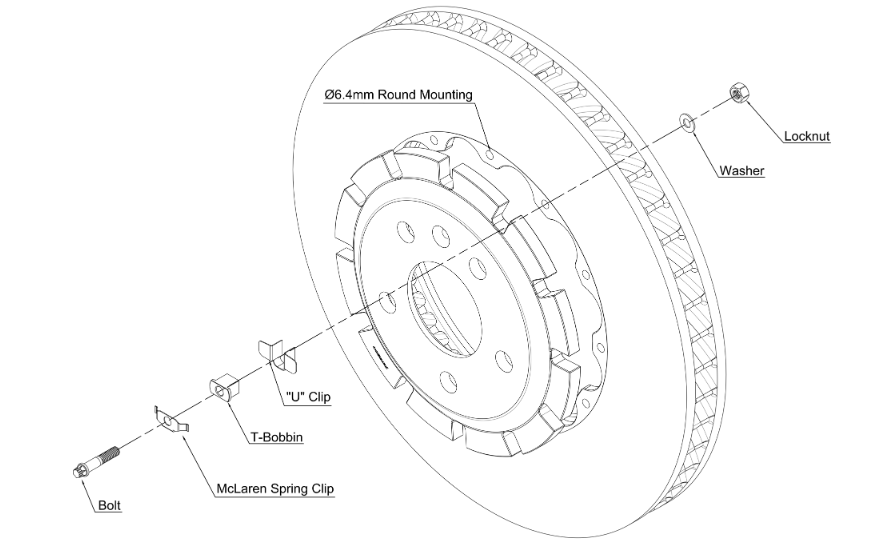
Step 3: Locate “U” clips into hat slots. Locate bobbins into hat slots. Align mounting holes of the hat with mounting holes of the rotor, and locate onto rotor. Inspect and ensure all bobbins are located properly in the holes of the rotor.
Step 4: Apply a small amount of high temperature threadlocker to cover 2-4 threads at the end of all bolts (Recommended: Loctite 243 or equivalent).
Step 5: Holding the aluminum hat onto the rotor, lift the assembly into vertical position. Locate the McLaren spring clips onto the wheel facing surface of the aluminum hat.
Note: The flanged side of the spring clip should be facing the center of the rotor.
Step 6: Assemble the bolts from the outside of the rotor, through the McLaren spring clips & bobbins. Locate washers onto the bolts from the inside of the rotor. Loosely assemble the locknuts (hand-tight).
Step 7: Inspect prior to tightening to ensure all components are installed properly. Tighten and torque all lock nuts in the sequence pattern shown below to 14 Nm / 10.5 lbf-ft
SKU: PRH.TA.8.CK