
630.360.2548
Ford F150 Raptor Series Tie Rod Conversion Kit Installation Instructions
These instructions are provided as a courtesy for customers installing the ADD Tie Rod kit along with our ALcon Big Brake Kit for Ford Raptor and F150
You can download the full instructions with diagrams here:
PREPARATION
1. Disconnect the negative terminal on the battery. Park the vehicle on level ground and set the emergency brake.
2. Raise your vehicle and support it with jack stands. Never work under an unsupported vehicle.
3. We recommend reading through the installation instructions in whole before performing the work.
4. You will need the following tools:
a. Ratchet
b. 3/4” Socket & Wrench
c. 13/16” Socket
d. 15/16” Socket & Wrench
e. Crescent Wrench
f. 5/8” Ream or Drill Bit
g. Drill Note: this installation requires 2 people for best results
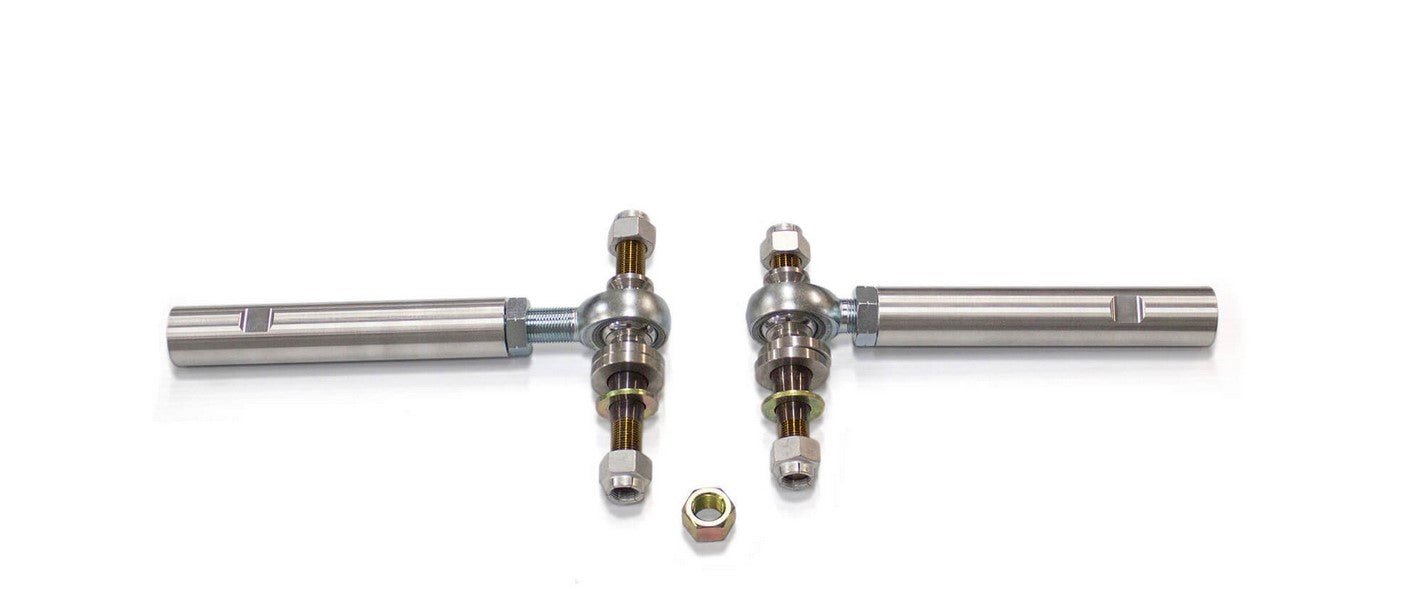
5. Included in Kit:
2 – Assembled Tie Rods (Outer Tie Rod End and Sleeve)
2 – Spindle Posts
2 – Washers – 5/8”
4 – Flex Lock Nut – 5/8”-18
4 – Tie Rod Adapter Post Spacer – 1/4” Thick
1 – Nut – 5/8”-18
REMOVAL
1. Remove the nut holding your OEM outer tie rod in place, then pop the ball joint free from the spindle.
2. Loosen the OEM alignment nut, then use a crescent wrench to spin the OEM outer tie rod assembly off of the OEM inner tie rod end. Leave the alignment nut on the threaded post of the inner tie rod.
3. Repeat Steps 1 & 2 on the opposite side of the vehicle.
INSTALLATION
1. Thread your new ADD Assembled Tie Rod End onto the threaded post of the OEM inner tie rod end.
2. Ream out the factory tie rod end location using a 5/8” Ream (a Drill Bit works if there is no Ream available).
3. Place the supplied Spindle Post into the newly reamed tie rod end location.
4. Place the supplied 5/8” Washer (x1) and the Gold NON-locking 5/8” Nut (x1) onto the bottom of the ADD Spindle Post.
5. Set the taper by tightening the newly installed 5/8” Non-Locking Nut until the post is fully seated in the spindle.
6. Place two of the supplied 1/4” Thick Spacers and the Tie Rod End onto the Spindle Post.
7. Install one of the supplied 5/8” Flex Locking Nuts onto the top of the Spindle Post. Tighten once it is in place.
8. Remove the 5/8” Gold Non-Locking Nut from the bottom of the post and replace it with the new 5/8” Flex Locking Nut. Tighten once the Flex Locking Nut is in place. Set aside the Gold Non-Locking Nut for installation on the other side of the vehicle.
9. Repeat the entire process on the other side of the truck.
10. ADD recommends doing a rough alignment before tightening your alignment nuts (Heim Jam Nuts).
11. A front end alignment is required after the installation of this product. 12. Stand back and enjoy your new ADD Tie Rod Kit. 13. Check and re-tighten if needed, all mounting bolts after 100 miles and periodically thereafter.