630.360.2548

DIY Brake Bleeding: Ensuring Safety and Performance for Your Truck
As a passionate DIY off-roader, you probably understand the importance of maintaining your trucks equipment for performance, reliability and safety. One aspect often overlooked is brake maintenance, specifically brake bleeding. Brake bleeding is the process of removing air and moisture from the brake system, ensuring efficient brake function and preventing potential safety hazards.
We suggest bleeding your brakes annually if you use them hard.
Why is brake bleeding necessary? Moisture can infiltrate the brake fluid over time, compromising its integrity and reducing its ability to transmit hydraulic pressure effectively. This can lead to spongy brakes, longer stopping distances, and even brake failure in extreme cases. Brake bleeding is the solution to eliminate these issues, preserving your truck's braking performance and overall safety on the road.
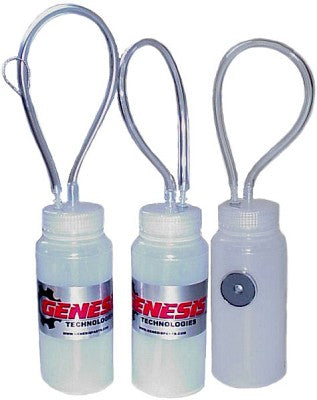
To embark on this task, you'll need a few tools: a brake bleeder kit, a pressurized brake bleeder (ideally), an open end wrench, and fresh brake fluid compatible with your vehicle. Safety should always be a priority, so make sure to wear protective gear, including gloves and safety glasses. Brake fluid is very damaging to paint, so take care.
Here's a step-by-step guide to brake bleeding:
-
Prepare Your Truck: Begin by ensuring your truck is parked on a level surface, the engine is turned off, and the emergency brake is engaged. Locate the brake fluid reservoir under the hood.
-
Gather Tools and Materials: Assemble your brake bleeder kit, brake fluid reservoir, wrench, and safety gear. Double-check that the brake fluid you're using is suitable for your truck.
-
Bleed the Brakes: Connect the brake bleeder kit to the brake caliper furthest from the master cylinder first. Loosen the bleeder valve with the wrench and attach the kit. With the help of a friend, pump the brake pedal until it feels firm, then hold it down while you tighten the bleeder valve. Repeat this process for each brake caliper, moving from the farthest to the closest to the master cylinder.
-
Monitor Brake Fluid Level: Throughout the process, keep an eye on the brake fluid level in the reservoir, ensuring it doesn't fall below the minimum level. Top up with fresh brake fluid as needed.
For a visual guide, there are numerous online videos demonstrating the brake bleeding process. Search for reputable sources such as automotive tutorial channels or manufacturer guides to complement your understanding.
By taking the time to bleed your brakes, you're not only ensuring the safety of your DIY adventures but also enhancing the overall performance of your truck. Stay safe, follow these instructions diligently, and enjoy the peace of mind that comes with a well-maintained braking system.
